
안녕하세요? 이번 글은 YOLOv7을 설치하고 시작하는 방법을 정리해 보겠습니다. 해당 학술 논문은 아래 arXiv에서 내려받으실 수 있고 제목은 "YOLOv7: Trainable bag-of-freebies sets new state-of-the-art for real-time object detectors"입니다. YOLO는 You Only Look Once의 약자로써 이미지 및 동영상 탐지에 사용되는 딥러닝 모델입니다.
*arXiv(아시브)는 물리학, 수학, 컴퓨터과학, 양적생물학, 양적금융학, 통계학, 전기공학 및 시스템과학, 경제학 분야의 2,100,680개 학술 논문(scholarly articles)을 위한 무료 배포 서비스이자 오픈 액세스 아카이브입니다. 이 사이트의 자료는 arXiv에서 동료 평가(peer-review: 논문을 비롯한 학문 연구에서 같은 분야의 전문가들이 저자의 연구물을 심사하는 과정)하지 않습니다.
YOLOv7: Trainable bag-of-freebies sets new state-of-the-art for real-time object detectors
YOLOv7 surpasses all known object detectors in both speed and accuracy in the range from 5 FPS to 160 FPS and has the highest accuracy 56.8% AP among all known real-time object detectors with 30 FPS or higher on GPU V100. YOLOv7-E6 object detector (56 FPS
arxiv.org
YOLOv7 논문의 1저자는 타이완 중앙연구원 정보과학연구소(Institute of Information Science, Academia Sinica, Taiwan)의 치엔-야오 왕(Chien-Yao Wang) 님입니다. 아래 깃허브가 Official YOLOv7입니다.
GitHub - WongKinYiu/yolov7: Implementation of paper - YOLOv7: Trainable bag-of-freebies sets new state-of-the-art for real-time
Implementation of paper - YOLOv7: Trainable bag-of-freebies sets new state-of-the-art for real-time object detectors - GitHub - WongKinYiu/yolov7: Implementation of paper - YOLOv7: Trainable bag-of...
github.com
아래의 그림은 MS COCO 데이터셋에 대하여 다른 모델과 비교한 YOLOv7의 객체 탐지 결과를 나타낸 것입니다. MS COCO(Microsoft Common Objects in Context)는 대규모의 객체탐지, 세그먼테이션 및 캡션 데이터셋(large-scale object detection, segmentation, and captioning dataset)을 지칭합니다.

이번 글은 아래의 'Inside Machine Learning' 내용을 재정리한 것입니다. YOLOv7 모델을 설치하고 이미지에 테스트하는 과정을 담고 있습니다. 자, 그럼 시작해볼까요?!
YOLOv7 How to Use ? – Best Tutorial simple
In this article, we will learn how to use YOLOv7: how to implement it, understand the results and use different weights!
inside-machinelearning.com
먼저 YOLOv7을 사용하기 위해 깃허브 저장소(GitHub repository)를 다운로드합니다. 저는 Windows를 사용하고 있는데요, 먼저 아래 링크에서 Windows용 Git을 설치하였습니다.
Git - Downloads
Downloads macOS Windows Linux/Unix Older releases are available and the Git source repository is on GitHub. GUI Clients Git comes with built-in GUI tools (git-gui, gitk), but there are several third-party tools for users looking for a platform-specific exp
git-scm.com
명령 프롬프트(cmd.exe)에서 git clone 명령어를 통해 깃허브 저장소를 다운로드합니다. 다음으로 'cd(change directory, 즉 디렉터리 변경) yolov7' 명령어로 해당 폴더에 접근합니다.
git clone https://github.com/WongKinYiu/yolov7.git
다음으로 YOLOv7 모델에 필요한 종속성 라이브러리를 설치해야 합니다. 아래 한 줄 코드면 충분합니다!
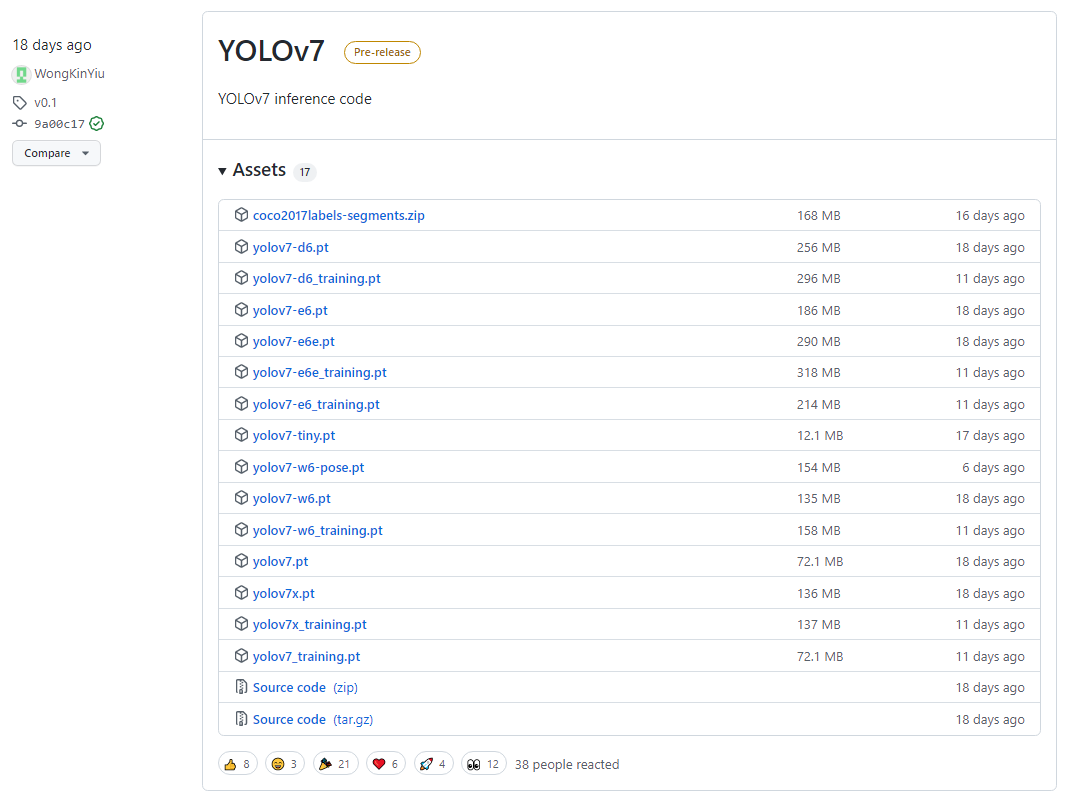
pip install -r requirements.txt이번에는 신경망의 가중치(weights) 파일을 다운로드 해야 합니다. 신경망에서 가중치는 훈련 중 모델이 얻은 정보입니다. 가중치는 아래 링크에서 직접 내려받거나, wget 라이브러리를 통해 다운로드할 수 있습니다. 여기서는 'yolo7-e6e.pt'를 내려받아 보겠습니다. yolov7 폴더에 위치시키면 됩니다.
Releases · WongKinYiu/yolov7
Implementation of paper - YOLOv7: Trainable bag-of-freebies sets new state-of-the-art for real-time object detectors - WongKinYiu/yolov7
github.com
wget 명령어는 윈도우에서 기본 제공하지 않습니다. 저는 wget을 설치한 후에 파이썬에서 아래 명령어로 내려받았습니다.
wget
pure python download utility
pypi.org
import wget
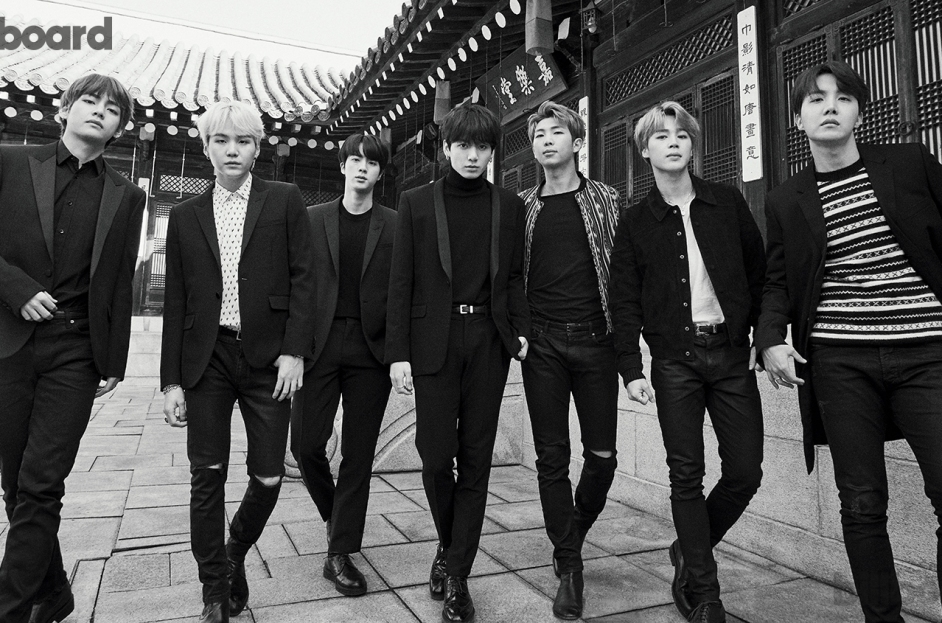
wget.download('https://github.com/WongKinYiu/yolov7/releases/download/v0.1/yolov7-e6e.pt')자, 이제 YOLOv7 모델을 사용할 수 있습니다! 이를 위해 이미지를 준비하고 detect.py를 호출해 봅니다. *빌보드에 실렸던 BTS 이미지를 사용해 보겠습니다.
가중치(--weight)와 이미지(--source)만 지정한 후, 객체 탐지 결과를 확인해 보겠습니다.
python detect.py --weights yolov7-e6e.pt --source ./bts.jpg
결과 이미지는 'yolov7/runs/detect/exp/'에서 확인하실 수 있습니다. 객체 탐지를 실행할 때마다 exp2, exp3와 같은 방식으로 다수의 폴더가 생성됩니다. 객체를 감지한 신뢰도(confidence)가 표시됨을 알 수 있습니다. 현재 기본 신뢰도 임계치(conf_thres: confidence threshold)는 0.25입니다. 신뢰도 25% 미만의 탐지는 제외됨을 뜻합니다.

이번에는 신뢰도 임계치를 0.6으로 변경해 보겠습니다. 결과를 보면 신뢰도 0.48인 tie가 제외된 것을 확인할 수 있습니다.
python detect.py --weights yolov7-e6e.pt --conf 0.60 --source ./bts.jpg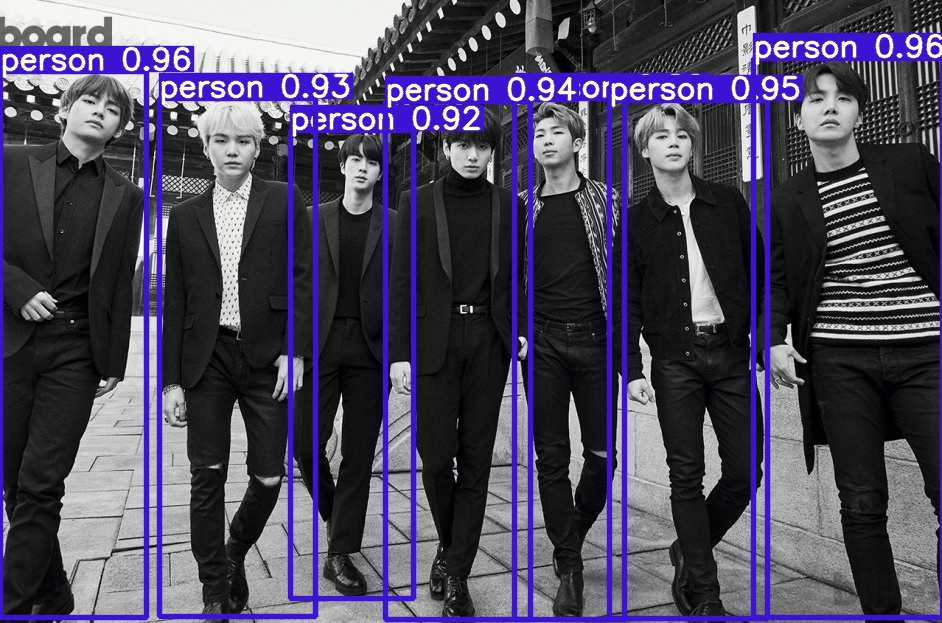
YOLOv7 가중치는 다양한 버전이 있습니다. 대형(Large) 가중치는 더 나은 결과를 제공하지만, 대신에 느린 계산 속도와 더 많은 메모리 공간 사용을 고려해야 합니다. 공간과 시간의 제약이 있다면 yolov7-tiny.pt(Small), yolov7.pt(Medium), yolov7-e6e.pt(Large) 중 버전을 선택할 수 있습니다. 여기까지 YOLOv7을 설치하고 이미지에 테스트하는 과정을 정리해 봤습니다.